


TRAVELER'S Notebook Singapore: The Complete Guide (2026)

The TRAVELER'S Notebook is one of the few stationery objects that genuinely gets better the longer you use it. The leather develops a patina unique to you. The inserts fill with memories. The whole thing becomes irreplaceable.
This guide covers everything — from understanding the components for the first time, to setting up multiple refills, to caring for your leather over years of use. If you're a complete beginner or a returning user wanting to go deeper, this is your reference.
- What is a TRAVELER'S Notebook?
- The Components — What You Get
- Regular vs Passport — Which Size?
- The Leather Cover In Depth
- All Refill Types Explained
- Accessories Guide
- How to Set Up Your Notebook
- Adding Multiple Refills
- How to Use Your TRAVELER'S Notebook
- Leather Care and Maintenance
- Midori, Faux-doris and the Name Change
- Frequently Asked Questions
- Where to Buy in Singapore
What Is a TRAVELER'S Notebook?
At its simplest, a TRAVELER'S Notebook is a leather cover that holds refillable notebooks together with elastic bands. But that description misses the point. The design philosophy behind it is about creating an object that grows with you — worn leather, layered refills, accumulated stickers and stamps — until the notebook becomes a kind of autobiography.
The system was originally created by Midori (a Japanese stationery brand under Designphil) in 2004. In 2016, Midori rebranded the notebook line under the name TRAVELER'S COMPANY, and the notebooks became officially known as TRAVELER'S notebooks. The spirit remained unchanged: a minimal, honest, deeply personal object that you use every day.
What makes it different from a regular notebook is the modularity. You aren't locked into one format. You can run a lined journal alongside a monthly planner alongside a watercolour sketchbook — all in one cover. And when a refill is full, you replace just that one, not the whole notebook.
The Components — What You Get
The system is made up of a few core components. Understanding what each one does makes setup and expansion much easier.

If you've had the chance to visit any Traveler's Factory stores in Japan, you'll know what I mean when I say it's paradise. It was the first thing on my to-do list after getting off the shinkansen at Tokyo Station. I had gullibly told my partner that I would only spend half an hour browsing. I took 2.
Trust me when I say it's hard to resist all the limited edition refills and trinkets. The essence of a TRAVELER'S Notebook is to enable you to pick what you love and turn it into one travel-friendly notebook.
That is why the notebook has been so popular with all kinds of journaling: bullet, travel, food, art and more.
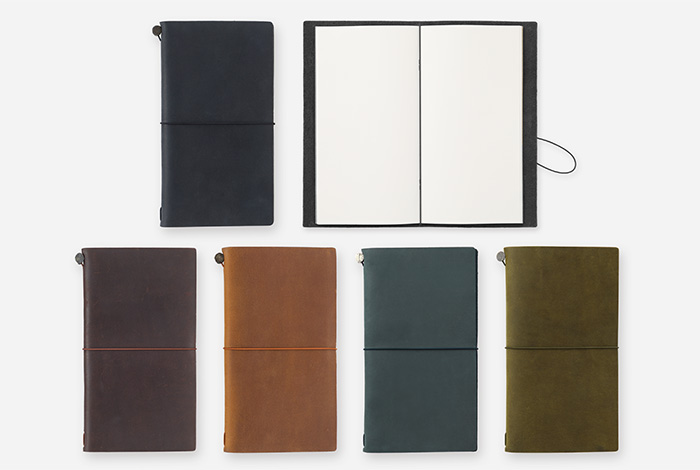
 Leather Cover
The base of your notebook. Vegetable-tanned leather in 5 standard colours. Each cover ages uniquely. Available in Regular and Passport sizes.
Shop Starter Kits → Notebook Refills
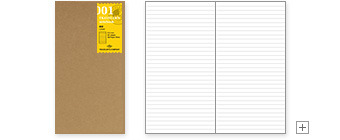
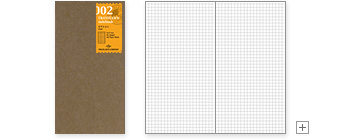
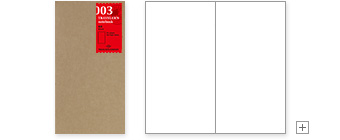
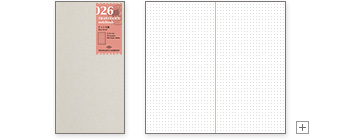
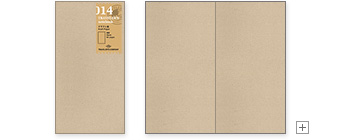
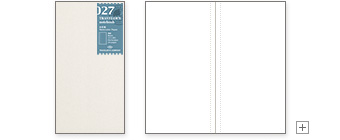
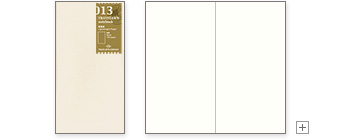
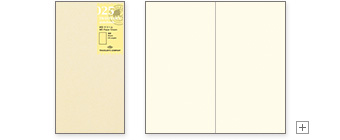
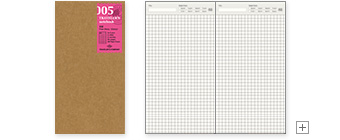
Where your thoughts and memories live. Lined, blank, grid, watercolour, weekly, monthly — refills come in many formats for every need.
Shop Refills → Elastic Bands
The bands hold refills inside the cover and close the notebook. Spare bands let you add multiple refills. Available in various colours.
Shop Bands → Embellishments & Extras
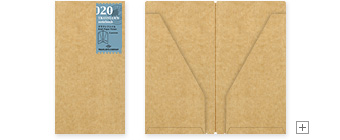
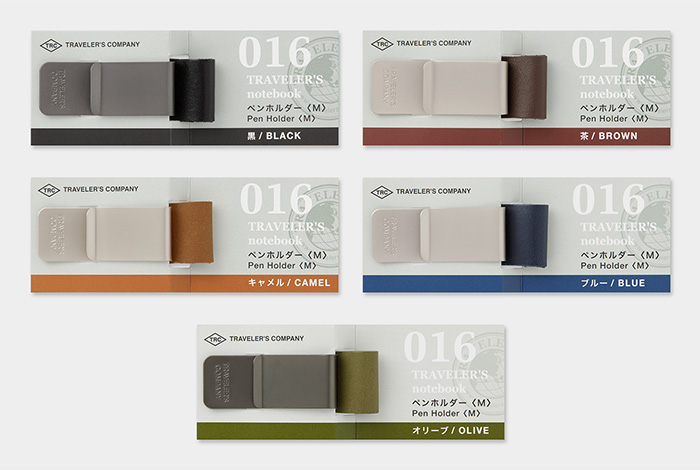
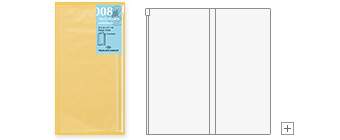
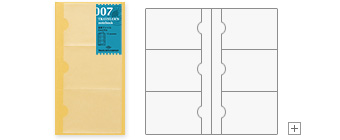
Sticker sheets, plastic pockets, sticky notes, zipper cases, card files. Store keepsakes, tickets and photos alongside your writing.
Shop Accessories → Metal Trinkets
Brass travel-themed charms that thread onto the outside band. Each one becomes a small, permanent souvenir of a trip or moment.
Shop Trinkets → Brass Products
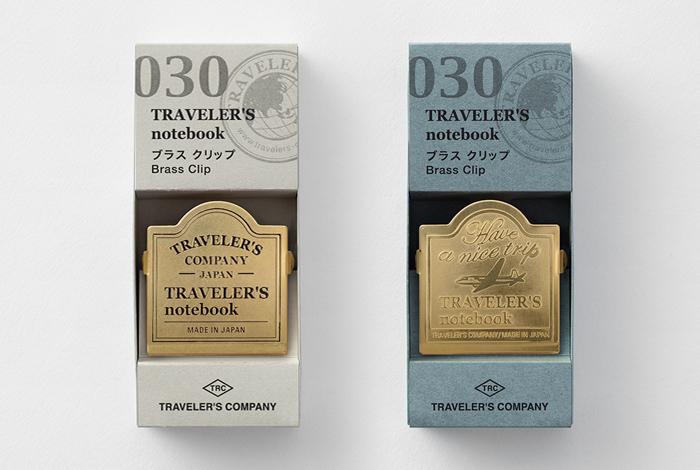
Writing tools, clips and accessories in solid brass. They develop patinas that complement the leather beautifully.
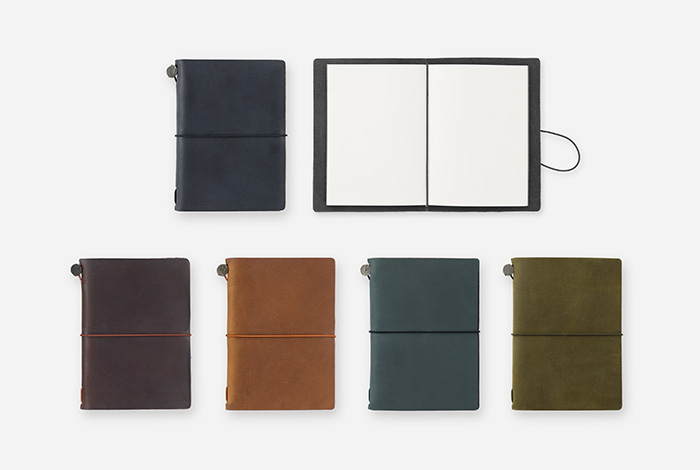
Shop Brass →Regular vs Passport — Which Size?
Both sizes use the same leather, the same elastic band system, and the same refill mechanism. The dimensions are the only difference — but that shapes how you live with the notebook every day.
| Regular | Passport | |
|---|---|---|
| Dimensions (closed) | 220 × 120mm | 134 × 98mm |
| Writing area (open) | 220 × 240mm (A5-adjacent) | 134 × 196mm |
| Pocketable? | No — bag carry | Yes — shirt or jacket pocket |
| Refill capacity | 1–3 comfortably | 1–2 comfortably |
| Insert variety | Widest selection | Good selection, smaller range |
| Best for | Daily journaling, scrapbooking, desk use | Travel, MRT notes, quick captures |
- You journal daily with more than a few lines
- You want to paste in mementos, tickets, clippings
- You plan to use multiple refills at once
- You write at a desk or use it from a bag
- You travel frequently and want true pocketability
- You write short entries — ideas, lists, itineraries
- You want a companion to a Regular you already own
- You commute by MRT and want easy one-hand access
If you're genuinely unsure, buy the Regular. Most Passport-first users end up getting a Regular eventually — the extra writing space is hard to give up once you start journaling in earnest.
The Leather Cover In Depth
The Five Standard Colours
How the Leather Ages
The cover uses vegetable-tanned cow leather — one of the oldest tanning methods, using plant-based tannins rather than chemicals. This type of leather is stiffer when new and softens with use. More importantly, it develops a patina: a darkening and richening of colour caused by the oils from your hands, light exposure, and general use.
The Camel and Brown covers show the most dramatic patina over time — they start honey-tan and gradually deepen to a rich dark amber. Black and Blue covers change more subtly, gaining a polished, worn look. No two covers age the same way, which is precisely the point.
New covers can feel stiff and resist laying flat. This is normal. Simply use it — the leather softens naturally with handling. Some users apply a small amount of leather conditioner (like Leather Milk or a neutral shoe cream) to the inside of the cover to speed up the softening process. Work it in with a cloth and let it absorb overnight. Avoid petroleum-based products, which can darken the leather unevenly.
All Refill Types Explained
This is where the system becomes genuinely powerful. TRAVELER'S notebook refills cover an impressive range of formats — from daily writing paper to planner pages to non-paper options. Understanding what's available helps you build the exact setup you need.
Writing Paper Refills
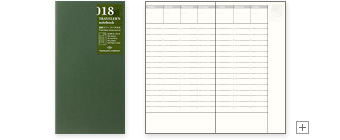
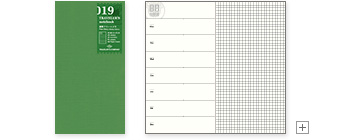
Planner and Diary Refills
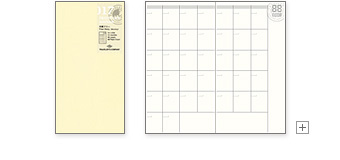
Non-Paper Refills

Accessories Guide
Accessories extend what your notebook can do without adding much bulk. These are the most useful ones to know about.


How to Set Up Your Notebook
Three steps to go from unboxed leather cover to a ready-to-use notebook. This is for a single refill — multi-refill setup is in the next section.

Open the cover to its centre. The elastic band runs through a hole in the spine. Open the refill to its centre page too, then slide it under the elastic band. Close the refill and the cover together — the band now holds the refill in place.

Pocket refills, card files, plastic sheets and kraft folders all go in the same way — open to the centre and slide under the elastic band. You can place them between refills to organise different content types.

Untie the rubber band on the outside of the leather cover. Thread the trinket's cord or loop through the band, re-tie the band. Each trinket threads on the same band — you can add several without any extra hardware.
Prefer a visual walkthrough?
▶ Watch: Guide to Setting Up a Traveler's Notebook (YouTube)Adding Multiple Refills
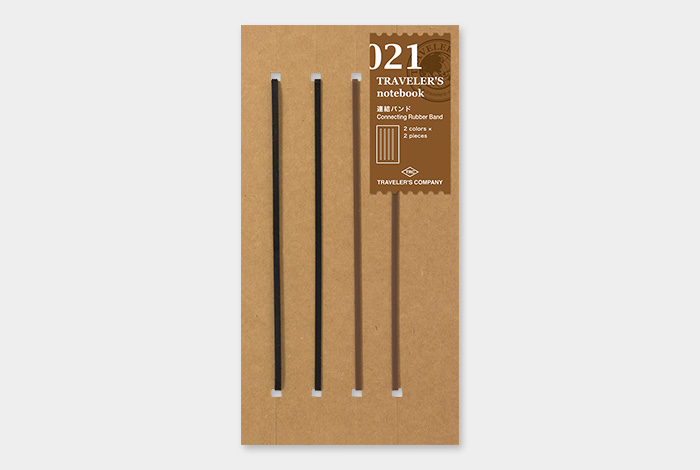
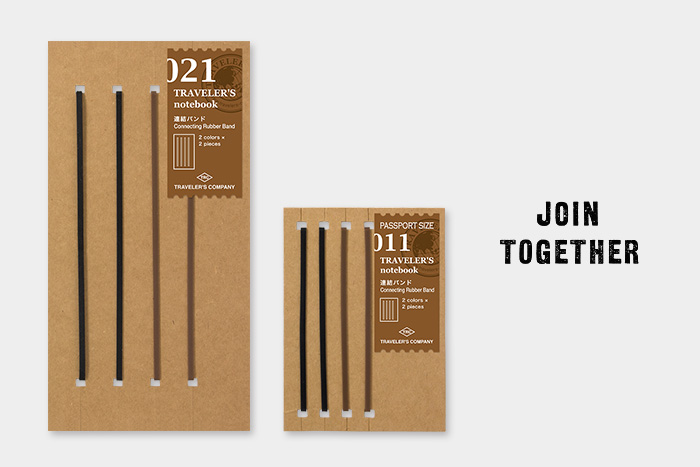
This is where the TRAVELER'S Notebook system becomes truly powerful. Using connecting rubber bands, you can carry two, three, or even more refills and accessories inside a single cover.
The centre elastic band acts as the anchor. One refill is always attached to this anchor band. Additional refills are linked using connecting rubber bands — sold separately as TRAVELER'S Notebook accessories — which loop through the centre pages of each refill to join them together inside the cover.
Setting Two Refills
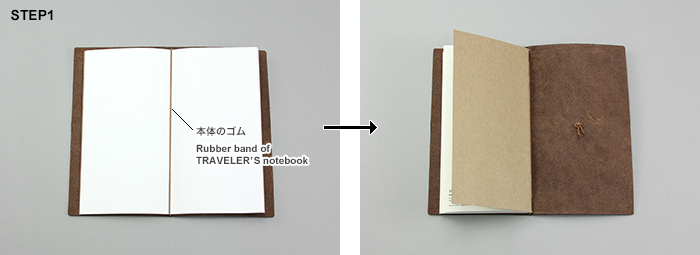
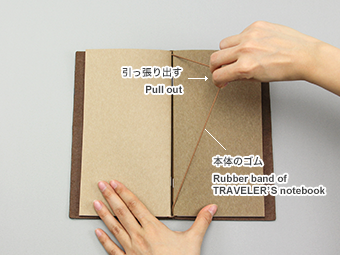
Pass a connecting rubber band through the cover's interior elastic band so both ends loop out from the spine.
Open your first refill to its exact centre pages. Slide it under the cover's main elastic band as normal — this is your anchor refill.
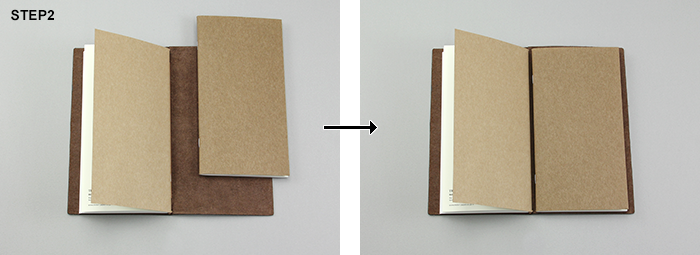
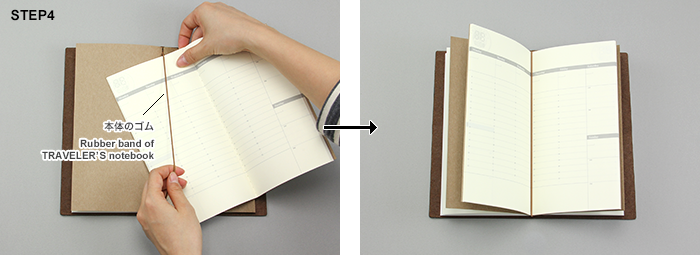
Open the second refill to its centre pages and hold it spine-to-spine with the first. Thread both ends of the connecting band through the centre of this second refill so the band passes through both spines together.
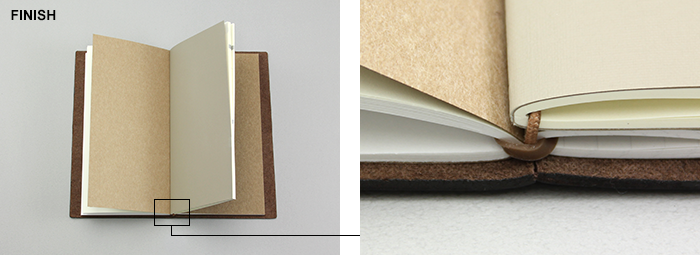
Close both refills together. The connecting band now holds the two refills as a pair inside the cover. Close the leather cover — done.
Two-Refill Setup in Motion

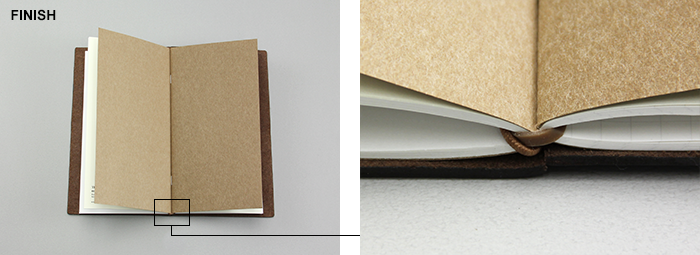
Setting Three Refills
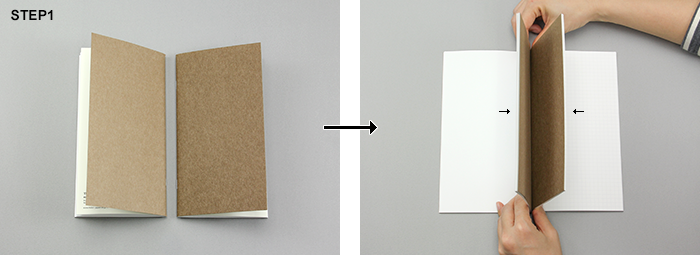
Hold two refills back-to-back (front covers facing outward) and open both to their exact centre pages simultaneously.
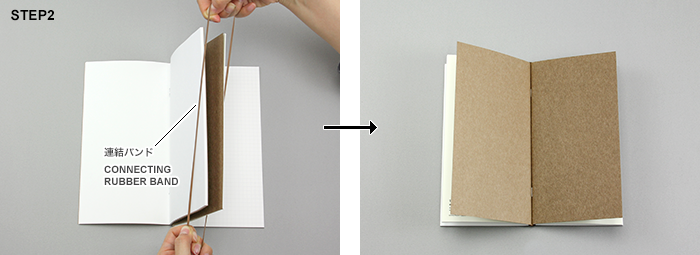
Thread a connecting rubber band through the centre pages of both refills so it runs through both spines together. Close the two refills — they are now connected as a pair.
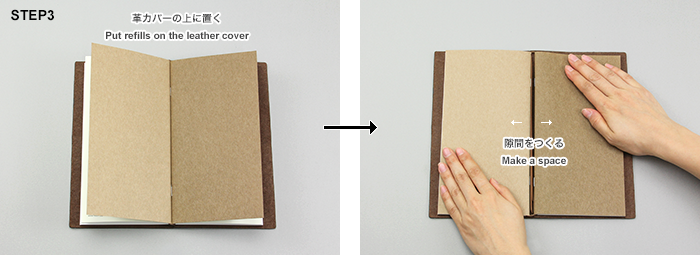
Open the leather cover flat. Place the connected pair of refills face-down inside the open cover, centred on the spine.
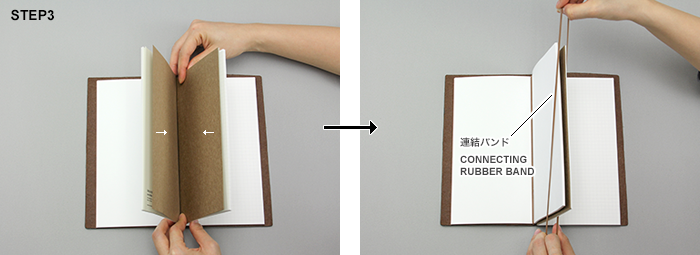
Gently pull the two connected refills apart at the centre to open a gap between them. The connecting band keeps them tethered.
Reach under the connected pair and pull the cover's main elastic band up through the gap so it sits between the two connected refills.
Open the third refill to its centre pages and slide it under the main cover elastic — the same way you would for a single refill. Close everything. All three refills are now nested together inside the cover.
Three-Refill Setup in Motion

Always stretch the connecting rubber band slowly and fully before threading it through. Forcing it without stretching can snap the band or nick the paper at the spine. Take your time — once you have the feel for it, it takes seconds.
Adding Accessories (Zipper Cases, Pockets)
Zipper cases and pocket refills follow the same logic as paper refills. Open to the centre, slide under the main elastic band or connect to an existing refill using a connecting band. For the outer position, open the zipper case flat and slip it under the outermost refill.
Each additional refill adds thickness. A Regular with three standard refills is still carry-anywhere thin. Beyond four items, the cover begins to feel stuffed and the closing band gets tight. Most users find two or three refills the sweet spot for everyday carry.
How to Use Your TRAVELER'S Notebook
Part of what makes the TRAVELER'S Notebook beloved is how differently people use them. Here are the most common setups — and what refills work best for each.
The original use case. Use a blank or kraft refill for daily entries and sketches, a watercolour refill for quick colour washes of scenes, and a zipper case for boarding passes, stamps, and small mementos. The leather cover takes on the look of a seasoned travel object.
A grid refill works perfectly for bullet journaling — the squares help with habit trackers, task lists, and layouts. Run a monthly diary alongside it for quick date reference. The narrow Regular pages suit vertical list-making naturally.
Use a lined or grid refill for meeting notes, a weekly diary for scheduling, and a card file for business cards. The notebook closes flat and looks professional in any meeting room.
Combine a watercolour refill with a blank refill. The Passport size is particularly popular for urban sketching — small enough for café tables and outdoor spots around Singapore and on trips.
A lined refill for daily writing alongside a plastic pocket or kraft folder for pasting in receipts, ticket stubs, photos and washi tape strips. Over time the notebook becomes a physical record of your days.
Add a card file and zipper case to carry your EZ-Link card, credit cards, cash, and receipts alongside your notebook. One object replaces both notebook and wallet. Works best with the Passport size.
Leather Care and Maintenance
Vegetable-tanned leather is durable but responsive to care. A little attention goes a long way — a well-maintained cover lasts decades.
- Apply a neutral leather conditioner once or twice a year
- Let it dry naturally if it gets wet — stuff with paper to hold shape
- Let the patina develop naturally from daily handling
- Store flat or upright, not crushed under weight
- Keep spare elastic bands on hand
- Direct heat or sunlight for extended periods
- Petroleum-based polishes — darken unevenly
- Soaking in water — the leather will warp and stiffen
- Silicone-based products — stop natural patina
- Overstuffing — fatigues the spine elastic band
Singapore's heat and humidity can accelerate the leather's softening — which is good for patina. However, if the cover is left in a humid bag for extended periods without air circulation, mould can develop on the inside surface. Air it out regularly and wipe the inside with a dry cloth if you notice any moisture build-up.
Midori, Faux-doris, and the Name Change
If you've been researching TRAVELER'S Notebooks for any length of time, you'll have encountered the word "Midori." Here's the history.
The notebook was created by Midori, a Japanese stationery brand under Designphil. For over a decade it was known as the "Midori Traveler's Notebook." In 2016, Midori rebranded the entire line under a dedicated sub-brand called TRAVELER'S COMPANY, and the product became officially the "TRAVELER'S notebook" (lowercase n). You'll still see many sellers and users referring to the "Midori" notebook — this is the same product. The MD paper refills are also still called MD paper, which stands for Midori Diary.
A faux-dori is a homemade or third-party alternative to the official TRAVELER'S notebook — a leather cover made using the same elastic-band-and-refill concept but not produced by TRAVELER'S COMPANY. Galen Leather, Baum-kuchen, and many Etsy makers produce compatible covers and refills. These are fine options, but the official leather and MD paper quality is genuinely excellent and worth comparing in person before choosing an alternative.
Frequently Asked Questions
Is the TRAVELER'S notebook paper fountain pen friendly?
How many refills can I fit in one cover?
What's the difference between Midori and TRAVELER'S notebook?
Can I use third-party inserts in my TRAVELER'S notebook?
How do I add a second refill without connecting bands?
How do I care for the leather cover?
What is a Starter Kit and should I buy one?
Is a TRAVELER'S notebook worth the price?
Where can I buy a TRAVELER'S notebook in Singapore?
Where to Buy in Singapore
Cityluxe is Singapore's dedicated stationery specialist and carries the full TRAVELER'S notebook range — including Starter Kits, all standard refills, connecting bands, brass accessories, and selected limited editions. We strongly recommend handling both sizes in person before buying your first one.
Cityluxe WorkRoom
📍 601 Sims Drive, #04-05, Singapore 387382
🕐 Mon–Fri 11am–7pm · Sat 12:30–6pm
🚇 11-min walk from Aljunied MRT (EW9) · Free visitor parking
Try both sizes in person, browse the full refill range, and get advice on the setup that suits your journaling style.
Personalisation — Embossing on TRAVELER'S Notebook Covers
Make your TRAVELER'S Notebook genuinely yours. Cityluxe WorkRoom offers leather embossing directly on the cover — your name, initials, a short phrase, or a date pressed into the leather in a clean, permanent impression.
- Works on all standard leather covers (Regular and Passport sizes)
- Latin characters and numbers; select scripts available — enquire for details
- No minimum order — single pieces welcome
- Done in-store at 601 Sims Drive; same-day collection available for simple requests
Popular for personal milestone gifts — new job, graduation, a journey beginning. Also available as part of a corporate gifting order.
Learn more about Cityluxe personalisation services →Explore the full TRAVELER'S Notebook range
Starter Kits, refills, and accessories — in store at 601 Sims Drive or online at cityluxe.sg.
Leave a comment